


Websites are not just for big corporations or computer science experts any more. Whether you want to create a personal blog or start a small business, a website increases your reach and puts you and what you have to say out there. This is the year 2021. Anybody can have a beautiful, elegant website and it doesn’t take too much effort.
This article fits into a series to guide you through the process from ideation to the actual website. In the first two installments of the series, we tackled the idea generation and content preparation. In part III, we take a look at what building options are available and help you make the right decision for your use case and experience level. Let’s just quickly cover the beginning once more in case you are just reading this article.
Preparation
Structure
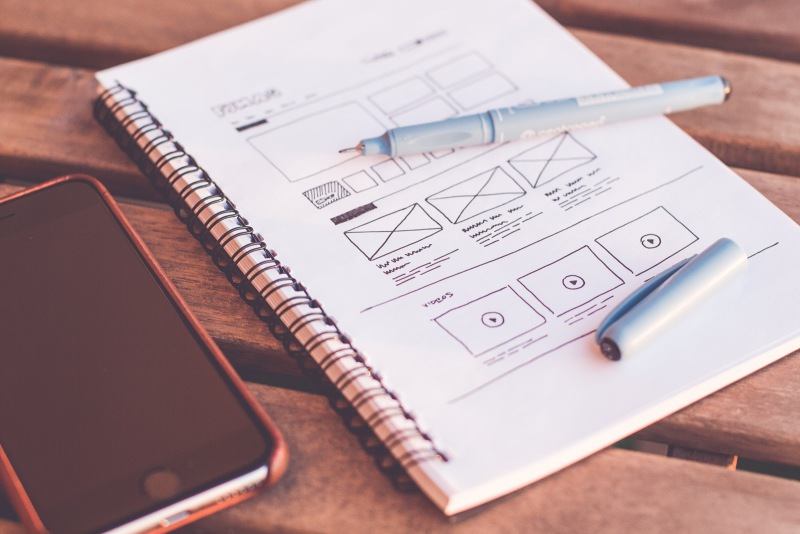
First, we recommend having a cohesive idea of what your website is supposed to be about. Do you primarily want to write about your experiences and share useful information with others, or do you want to showcase your talent and creation visually? Even before you actually start building the website, you should plan out your strategy and structure. This can be done without any coding experience at all. Just go to the drawing table and make an outline. It helps asking for the opinion of friends and strangers if your idea is understood by others not as deep inside the topic as you are.

Content
A website needs content to be filled with. Start writing your content now, so that you have input once your website’s skeleton is ready. Do some research to get an understanding of what people want in order to maximize the traffic your website receives. What do people search for and how do they phrase it? This is called keyword research and part of the wide field of SEO, Search Engine Optimization. If your brand needs a logo and you don’t have one yet, now is the time to get crafty and set on a color scheme.
Visuals
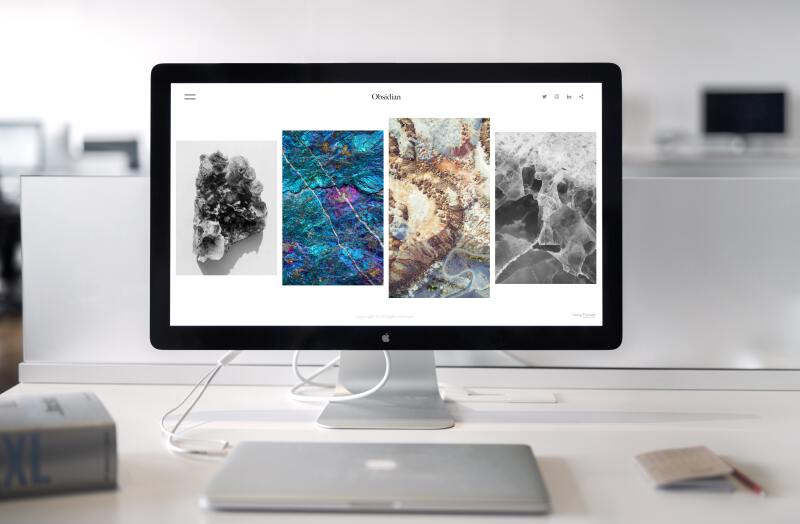
Speaking of images, take lots of pictures or create graphics to support your content visually. Even if you are not a photoshop expert, you can still make your images pop with basic image editing. A little bit of tweaking the brightness, saturation and clarity, or adding a filter goes a long way. Your computer already comes with a basic image application. On top of editing, you can run your images through an image optimizer or compressor to reduce the file size while maintaining the quality. The smaller the files on your page, the faster it will load. This improves your site’s user experience and is rewarded by search engine algorithms.
Recap
To recap, your preparation before you can even set out to create a website should include:
✓ a concept
✓ a layout structure
✓ a logo and color scheme
✓ content
✓ edited and optimized images.
Website Builder vs. Do It Yourself
Now that you have prepared your content, layout and visuals, it is time to look at the options that you have to create your website. Choosing a website builder may be overwhelming because there are so many. Yet creating it yourself, even with some knowledge of HTML and CSS can seem like a daunting task. We’ll look at each option and shed some light on the choices to help you decide.
Website Builders
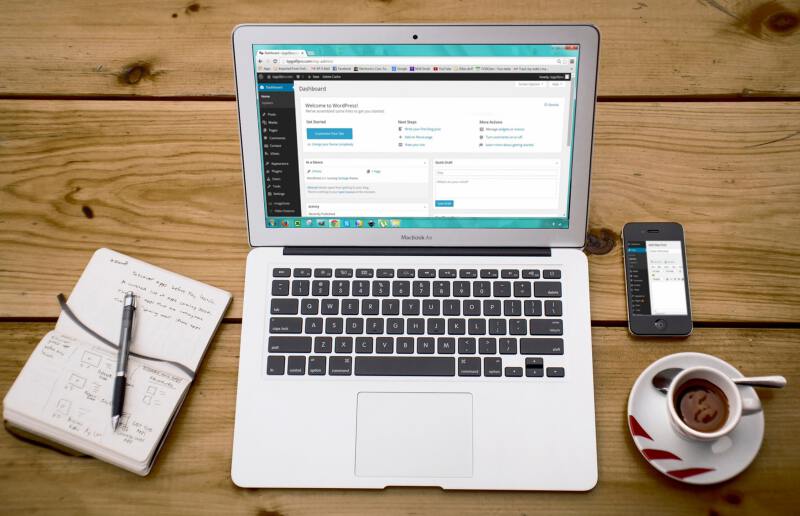
Today, you don’t need a computer science degree or any coding knowledge for that matter to make a website. You can start out without any prior experience by using an online website builder software. You have probably already heard of some of them, for instance WordPress, Squarespace, or Jimdo to name a few. Most website builders allow you to work on a WYSIWYG (What You See Is What You Get) interface instead of in code. You select from a range of predefined design themes. Each template can further be customized with styling options, laying out your building blocks, and of course giving it your very own spin with your writing and image content.
Website builders are a fast way to get a website up. They are easy to use with drag and drop functionality and media storage. The hosting is done for you and you can even buy your domain name directly from them. Why would not everyone use them? For every advantage, there’s a disadvantage. Website builders may limit your options in how accurately you can style your site and thus can make your site look too simple or generic. The underlying code may be hard to adjust. In other cases it can take too much time to load. Anything longer than 3 seconds starts to have a harmful effect on your site’s performance.
Also, most website builder services cost money, usually with a monthly or yearly subscription fee. If you have a rather simple website, however, they probably serve you well and offer everything you need. They might even stay free if you don’t need much traffic or advanced features. In the end, it’s more important to have your website online at all than having a perfect website!
Do It Yourself
What’s the alternative? You can do it yourself (DIY)! A greater skillset is needed however to build a website on your own. At a minimum you need to be comfortable with the markup language HTML and with the style sheet language CSS. We will explain these further as we continue on. Both are not too difficult to learn and once you know your way around, the sky (and not the template settings of your website builder) is the limit for your website. Not only can you get more out of your site, hosting a self-built site is usually also cheaper over time.
If you want to customize the templates given to you from the website builders, you need to get into CSS at some point. A good strategy could be to start out with a website builder or to test a few design ideas. Then when you are more confident, you can create a website on your own.

Website Builder Comparison
If you search for a website builder, you will find many different options. The market is already well established. While we can’t list every one, we can examine some of the more prominent ones.
WordPress
Pro
- huge pool of plugins
- choose the tools needed
- cheap on its own
Con
- few themes included
- complicated user interface
- plugin costs add up
- plugins can interfere each other
Monthly Price
- personal: € 4
- premium: € 8
- business: € 25
- e-commerce: € 45
Squarespace
Pro
- WYSIWYG interface
- large pool of design options
- extensive help section and community
- media storage
Con
- expensive
- bulky underlying code
- custom CSS code can break with code updates
Monthly Price
- personal: € 11
- business: € 17
- com. basic: € 24
- com. advanced: € 36
Jimdo
Pro
- free option
- user-friendly
- transparent code
- GDPR compliance
Con
- fewer templates
- editing and customizing can get difficult
Monthly Price
- play: € 0
- start: € 9
- grow: € 15
- grow legal: € 20
- unlimited: € 39
Wix
Pro
- WYSIWYG interface
- 100 free templates
- flexible drag-and-drop
- supports animations
- Wix ADI
Con
- free option with Wix ads
- templates can’t be changed
- loading often takes too long
Monthly Price
- free: € 0
- connect domain: € 5
- combo: € 10
- unlimited: € 14.50
- VIP: € 28
WordPress
WordPress is more than just a website builder, it is a content management system. A forerunner of the industry, WordPress has the largest ecosystem around it. The number of available plugins to up your site is sheer endless. Out of every website builder, WordPress comes with the most plugins available which allows you to build your own tool kit with only the tools you really need. Note however that while some plugins are free, most will come with a price tag which you need to account for when calculating your overall cost. As such WordPress on its own is relatively cheap, but features only a limited amount of themes and functionalities.
The WordPress interface as a first of its generation does not get an award for best user interface. You have the option to write your site in visual or HTML mode. Start by writing in visual mode, then check out how your layout translates to HTML code. A warning from experience, though. It can happen that you arrange your site in visual mode, yet when saved, the HTML is back to tags you did not set. As for the plugin concept, it can lead to unexpected problems as well. The more plugins you have, the more you risk they interfere with each other potentially breaking things in the process.
Squarespace
Squarespace appeals to the creative non-technical user wishing to showcase their craft or service in an easy yet elegant way. Many artists’, designers’ and lifestyle bloggers’ portfolios are created with Squarespace. Small business owners as well appreciate the benefits of this quick start into a professional looking image forward website.
With a sleek user interface, Squarespace is the WYSIWYG modular building block system that WordPress isn’t. Your site is responsive and automatically optimized for desktop, tablet and mobile use. After choosing from more than 100 design family options, you add your content block by block be it text, images, buttons or even your own bits of code. Site wide styles customize fonts, sizes, colors etc. to your liking. The more pages you add, you may find that one style for paragraph text and three headlines are not enough and you need to further specify your styling settings. This is where you can try your hand at CSS. The Squarespace customer service does not consult on custom code, but there is an extensive help section and an active community you can turn to.
No website is fully code-free even if you didn’t write any code yourself. With Squarespace, the responsive and flexible building block system translates into large underlying code. This means two things. First of all, as indicated earlier, large code increases the browser reading time and makes your site slower than optimal. Second, this is the service Squarespace is in and as such you pay with a sizable monthly or annual subscription. With the Squarespace developers continuing to work on their templates, they sometimes change without prior notice which can break with your custom CSS code.
Jimdo
Jimdo is the most wide-spread German website builder. It started when three high school friends with their own internet agency noticed a trend of more and more customers wanting to take content matters into their own hands instead of handing over every request for change to an agency. Yet, they did not know how to code themselves.
A budget- as well as user-friendly tool, Jimdo is cheaper (in the lower-end plans) and simpler than WordPress or Squarespace. The “Play” plan with an individualized Jimdo-domain (.jimdofree.com) is even completely free. It is ideal for your personal blog or temporary non-commercial events like your wedding. The onboarding is playfully easy and friction-less. If you want to customize code, you can do so directly in the stylesheet. To compare, in Squarespace you have to find out the style tags first as they are different across templates and then it only allows you to add code overwriting the existing one. The variety of templates in Jimdo however is not as plentiful as Squarespace.
Particularly interesting if you run a commercial website in Europe are the legal text modules included in the two most comprehensive plans “Unlimited” and “Grow Legal”. They ensure your website is GDPR compliant and dunning-proof fending off those law firms who go around looking to fine people for nothing else than their own gain. Jimdo takes you out of the legal limbo that website regulations are and promises to update you according to new rulings.
Wix
Besides the three aforementioned website builders, you can find many other offerings to create your site. Wix for example is a website builder you may have seen online or on TV. They are heavily investing in media campaigns particularly in the US, but I am yet to meet anybody who uses it. It consistently ranks very high in reviews, so they surely do a lot right. A main distinction over WordPress is that Wix is cloud based all the way.
As an editor Wix is similar to Squarespace in that you select and fill building blocks. Where squarespace labels them by name, Wix predominantly uses icons which take a moment to orient in. Unique with Wix is the new Artificial Design Intelligence (ADI). Answering a few questions, questions we can take cues from for our DIY website ideation, results in a ready made website with industry related stock imagery and generic text, or extracted from a previous website you may have had. If you need a website, any website, within minutes, Wix ADI gets you there by taking a lot of choices off your hands.
It is by no means real AI, but instead of sorting through all possible templates in the non-AI editor, suggests a few common options for your industry and fills the blocks with related pictures and text. Content can be edited in real-time on a left-hand side panel as opposed to in the block itself. With design options being finite, you better add your own spin to it for your unique personality to shine through, otherwise your site will lack differentiation.
Others
Tumblr is a microblogging and social media platform. It derives its name from tumblelog, short-form blogs. Big in the early 2010s for its GIF centric content, Tumblr lately finds itself in a tumultuous tumbling down phase. Caught in between ever more professional looking, advertising centric influencer blogs and fast content social media of the day Instagram, Snapchat or TikTok, Tumblr misses to sustain its position.
Your DIY Website Project
The overview of website builders may have let you to prefer one over the other. But really you don’t need any of them. You are fully capable of creating a website on your own. Yes, you need some skills, but the same as it takes time to familiarize with the interface of which ever website builder you would choose, you can just as well learn basic HTML and CSS. The long term benefits of knowing HTML and CSS over knowing an interface are by far greater.

Learn HTML and CSS
The basics of HTML and CSS can be learnt in a matter of days by working through online tutorials or taking a course. Tutorials such as W3Schools lay out a solid foundation in the theoretics of programming languages and also later stay a reference for problem-solving and inspiration. The learning platform Codecademy teaches interactively by practicing directly on lines of code. While it only exemplifies a few values per parameter or topic, it doesn’t convey the full range of possibilities. For that you still need to look up glossaries elsewhere.
If self study just isn’t your thing, you’d like to ask questions for clarifications, or you simply would like to include more practice in your learning, visit a live course. A good course can teach you all you need to know in as little as 27 course hours. At Hamburg Coding School for example the basic course takes 5 weeks at 2 sessions a week. No matter which learning method you choose, with a little bit of concentration and dedication, you can become HTML and CSS proficient enough to build your own website, a website you can be proud of.
The HTML Grid
To begin writing your own code, you need a text editor. You will likely have one pre-installed on your system. Microsoft Windows for example comes with Notepad, while Apple MacOs has TextEdit readily available for you. But, really it can be any text editor you feel comfortable with. You’ll be surprised how many there are. We won’t recommend any specific text editor, but suggest you take one that allows for dark mode, e.g. black background, and syntax highlighting, e.g. coloring elements of code differently according to category, for better visibility and readability. Your eyes will thank you after a long session of coding.
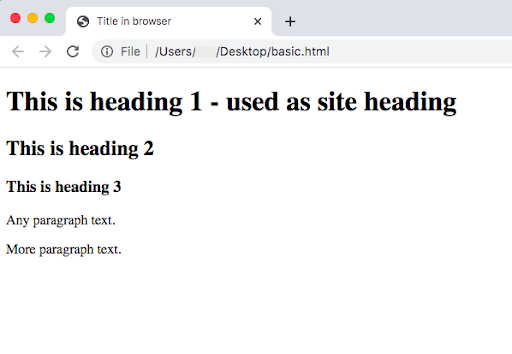
Now that you have your text editor, create a new document and save it with the extension .html to make it an HTML file. The first page is always called index.html. To work on your code, open the document in your text editor. To view what your code looks like, open it in your browser. Your site is not published, but you can get a preview from your locally saved files.
The most basic HTML grid marks the document type <!DOCTYPE HTML> and is completely enclosed by an <html> tag. <head> and <body> are two parts of the site. One is the actual representation of the site in the browser directed at the visitor, the <body>. The other provides information to browser and third parties in the background, the <head>. While the <body> has a <header> which is the part of a website where typically logo and navigation go, it is very different from the <head>. The most the visitor sees of the <head> are the title and favicon on the tab in the browser window.
<!DOCTYPE HTML>
<html>
<head>
   <title>Title in Browser</title>
</head>
<body>
   <header>
      <h1>This is heading 1 - used as site heading</h1>
   </header>
   <section>
      <h2>This is heading 2</h2>
      <h3>This is heading 3</h3>
      <p>Any paragraph text.</p>
      <p>More paragraph text.</p>
   </section>
</body>
</html>
The <body> is where all the content and design flows into. Go back to your previously prepared structure, content and visuals. Here, you’ll put everything you want to show your audience, putting your HTML skills to work.
CSS properties
If you look at this site in the browser, everything is black and white. A bit boring. For more colors on your site, create a CSS style sheet in the text editor with the extension .css and link your HTML document to it. The link is a line in the <head> and needs to refer to your CSS file’s name:
<!DOCTYPE HTML>
<html>
<head>
   <title>Title in Browser</title>
   <link rel="stylesheet" type="text/css" href="basicstyle.css">
</head>
<body>
   <header>
      ...
What design choices you make, is entirely up to you. Play with fonts, size, colors, as well as with width, margins, positions and so much more. The list of CSS properties and their possible values is long. Sometimes you might have an idea, but might not know the exact convention of the CSS property. This can easily be researched online. Google is your friend and there are many helpful coders out there in forums.
Besides the CSS style sheet, you can link to templates which have already sorted out some formatting issues for you, saving you the need to write them all up yourself. The Bootstrap framework, essentially a CSS style sheet, is one of those. In this case, it splits up the canvas into even sized columns (.col-xs- / .col-sm- / .col-md- / .col-lg- / .col-xl-) which are responsive to varying window widths. You link to it by establishing a stylesheet relation and linking to the bootstrap framework URL:
<link rel="stylesheet" href="https://maxcdn.bootstrapcdn.com/bootstrap/3.3.6/css/bootstrap.min.css"/>
In HTML you then refer to the precast classes.
Hosting and domain
Once you have created a website you are proud of, it’s time to share it with the world. For now, your creation is only locally available on your computer. You need to think of a website address and buy this domain name from a domain name registrar. When using a website builder, they too offer this service. Domain names are commonly bought as annual subscription, often costing less than € 10 per year. Once a domain is yours, you have priority in renewing your subscription. Nobody can just buy it from under you.
Most domain name registrars are hosting services as well. Since you will need hosting for your website, it makes sense to shop around. Often you get good package deals. All hosting services have access to the same pool of available domain names. You don’t limit yourself by choosing one service over the other. Which doesn’t mean that your first choice can’t be already taken. Top-level .com domains are especially popular and prices for them can be higher than the same name with a .de top-level domain. Try out several variations of top-level domains and spelling.
The last step is to upload your files, i.e. your HTML and CSS files, as well as other media like images, audio or videos. Uploading your website files to your hosting service publishes the site. If your site uses large media, database or application files, you can also save them on a separate server which may be faster and cheaper than on your hosting server. Just make sure the link in your HTML file directs to where this external media is saved.
There you have it. You have purchased and registered a domain name and uploaded your files. Your website is now online. From part IV of the series onward, we dive deeper into HTML & CSS in tutorial form.